Ready to Move On?
If you’re doing the Sensor Starters in order, your next stop is the UV sensor! Good luck and have fun!

The light sensor on board databot™ is the APDS-9301 miniature ambient light photo sensor manufactured by Avago. This awesome little package was built to respond in a fashion similar to the human eye – so it’s essentially seeing the same light levels you do.
This sensor is used in a variety of devices to control display backlighting such as cell phones, notebooks, tablets, flat panel TVs, etc. It’s also used for automated light management, electronic signs and signal, dashboard light controls and other devices that react to light levels. When you see a street light turn on, or your phone screen automatically dim based on the lights going down, it’s because of a sensor just like this one.
Look on the main sensor board and look for the sensor – it will be labeled “Lux.”

This sensor uses photodiodes to convert light into electrical current. Photons strike the photodiodes and generate current that is then measured and converted to output units such as Lux.

The lux (symbol: lx) is the International System of Units (SI) unit of measurement equal to one lumen per square meter. For the purposes of beginning experimentation lux is a standardized unit of measurement of light. Students can take comparative readings throughout a classroom, for example, to begin to grasp the correlation between units of lux and brightness. To dive into it deeper, do some research on lux and lumens. Look for links and resources at the end of this document.
 If you haven’t setup your Science Journal app yet do that now and come back to these Sensor Starter activities.
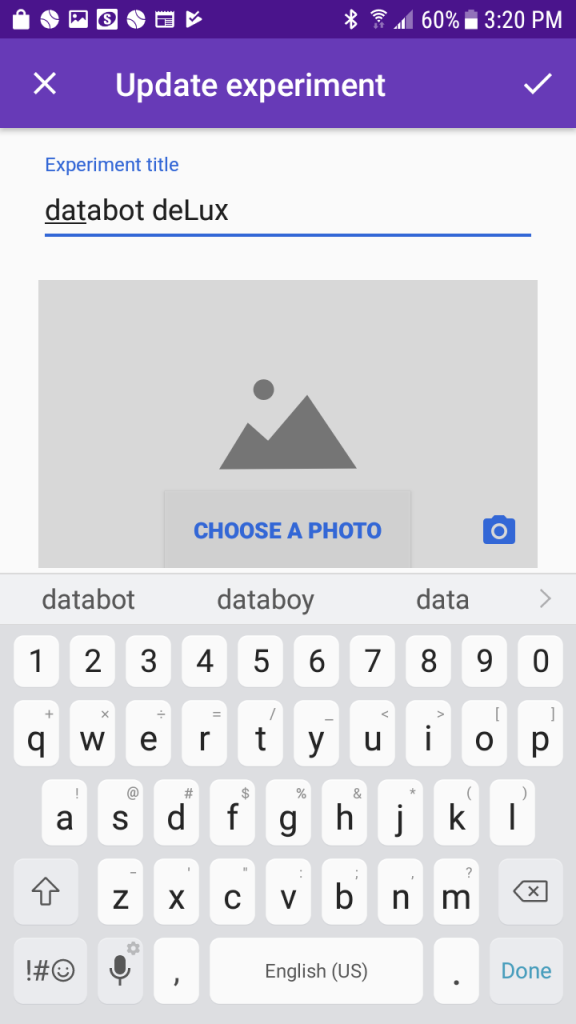
Begin your Lux explorations by creating a new experiment in your Journal as follows:
Congrats! Use the back arrow to exit your experiment and admire your work. Check out your newly titled and imaged experiment!
 Return to your experiment and open the sensor display area by clicking on the data icon in the observations section. It looks like a circle with a wavy line through it.
Depending on your device, a sensor display “card” will appear – perhaps the internal microphone or ambient light on the device or Chromebook you are using.
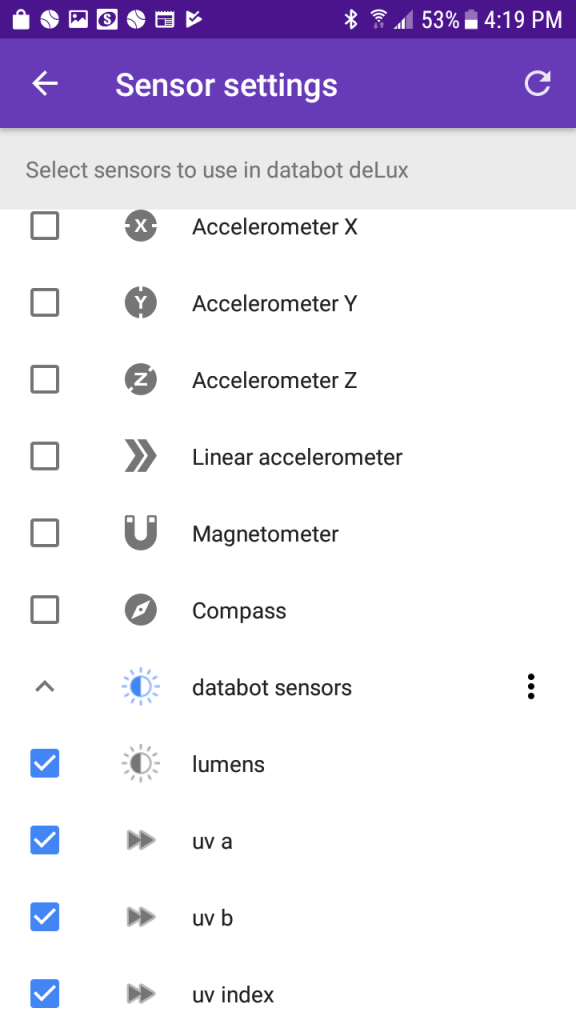
Time to get the Lux sensor loaded!
Test it by watching the data display and covering and uncovering databot. You should see the data display change with the light intensity.
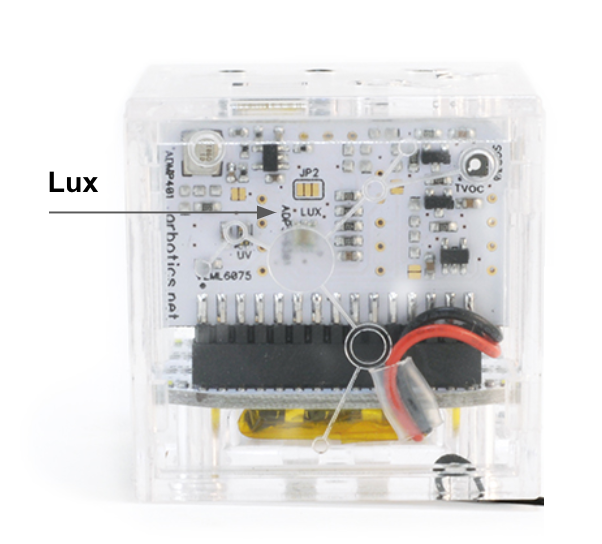
One of the objectives of the data game is to familiarize yourself and students with the construction of databot and where sensors and other components are located. Take a look at the main sensor board on the front of databot™ and look for the lux label. The sensor should look similar to the image at the beginning of this activity.
Depending on how many databot™s you have, pass one around the room and have students find it or put them into groups and challenge them to find it as a group. Tell them to look for the term “lux” and raise their hand when they find it.
 Time to go on an illumination safari. In groups or individually, students need to create an experiment in Google Science Journal and prepare to record data and make notes on the following challenges.
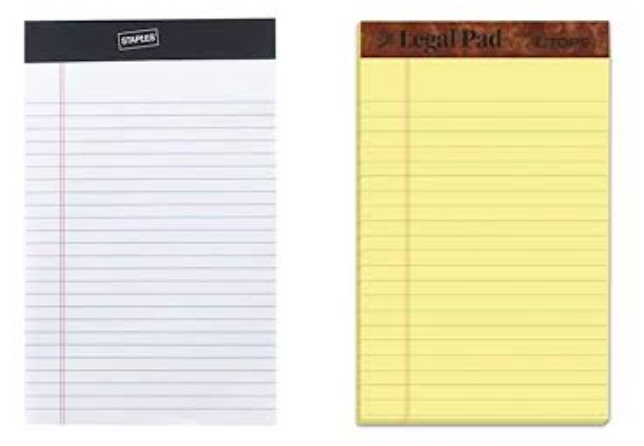 Light travels in waves, and depending on the medium it is passing through certain wavelengths may pass through unhindered and some may be blocked. Try placing different materials such as different colored papers or fabrics in front of the databot™ lux sensor to accomplish the following: