databot™ Basic Training

'Bot Basics to Get You Going

databot™ has many capabilities and uses, let’s start with the basics and get comfortable.

Getting Started - Pieces and Parts

Your databot™ kit comes with all the materials you need to start collecting data, doing experiments, and programming.  Here’s a quick rundown on your pieces and parts!

Softcase


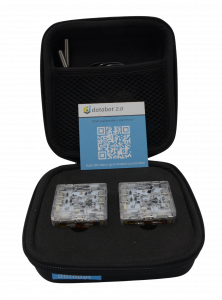
When not in use in the field, databot™ likes to kick back and relax in this rich and luxurious black matte, easily stored, zippered case!  databot™ likes to brag that it’s not just about comfort and safety but serious style.  

databot™ likes company. If you purchased a Twin Pack or Classroom Set you’ll find 2 bots for each case, snug as a bug in a rug.  Keep your case tidy and organized and you’ll always have what you need at your fingertips!

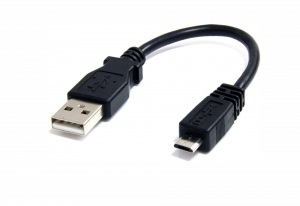
Micro USB Cable

This is your lifeline to databot™.  Use this cable to both charge and transfer programs to databot™ ‘s Arduino based brain. 

The rear port in databot™  is the power and programming port  and it matches the small end of this cable – use that to plug it in to any 5v source to charge up the internal battery. You can also use an external 5v USB power supply and connect databot™ for extra long run-times in the field.

Finally, it’s where you plug in to transfer programs and teach databot™ new tricks!

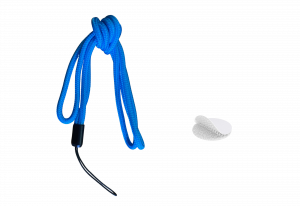
Lanyard & Velcro Fastener


databot™ was born for action so you can launch, swing, egg drop, play toss, and more with it. databot™ ships with a lanyard so you can easily connect it by looping it through the opening in one corner of databot™’s plastic enclosure.  Hang it off your neck, swing it like a bolo – go for it!  Each databot™ also includes a handy-dandy velcro dot that you can use to attach databot™ to drones, walls, monitors, and any other item you can think of that might need some data logging action.

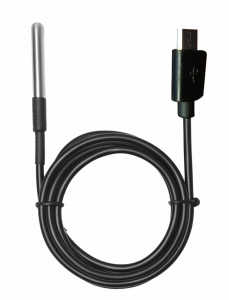
External Temperature Probe


databot™ has two dedicated ports located on the left side dedicated for temperature probes.    One probe is included in your kit, and additional probes are available on our website.  Use this to take environmental temperature readings of a local creek or pond, use it for monitoring temperatures during chemical reactions, or just hold it in your hand and check out your own temperature!  databot™ IS NOT WATERPROOF so please don’t  toss databot™ in a pond, just use the probe!  

databot™


And of course, last but not least – you should have a databot™ in your kit!  Let’s move on to databot™’s features now and get ready to start some serious science fun.

databot™ First Look & Home Position

databot™ First Look


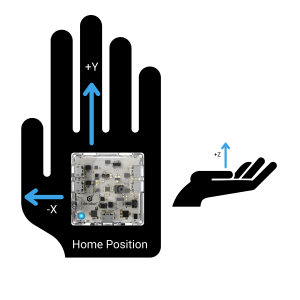
Hold databot™ in your hand as illustrated here and look it over carefully. We call this the “home” position so you can learn how to orient your databot™ correctly for various activities.  

The dimensions of databot™ are 42.5mm wide by 42.5mm long by 20 mm high.  databot™ weighs 34 grams.  You will notice some distinctive features on three sides of the device. 

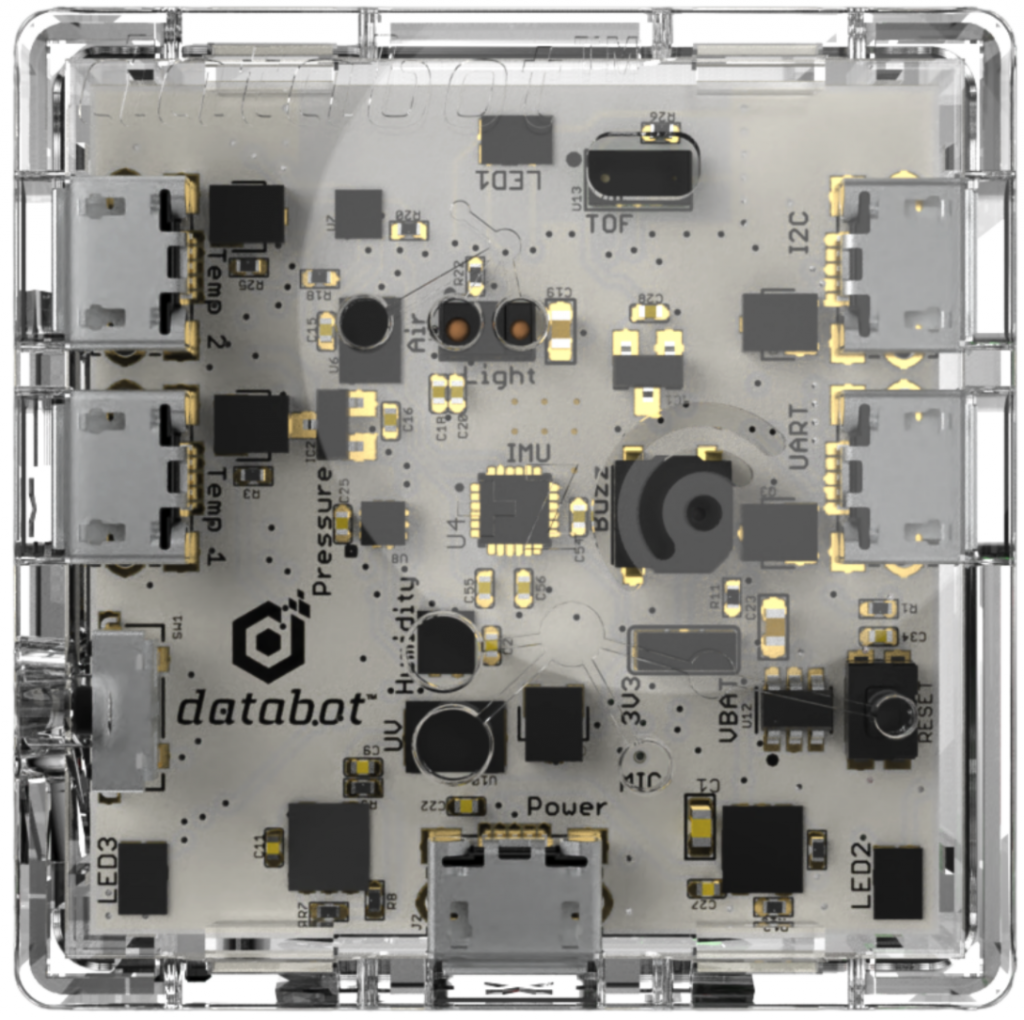
Look down from the top and you will see the databot™ circuit board and if you look closely, you will notice the board has many labels to identify sensors, ports. etc.  This makes databot™ sensors easy to highlight to students.  databot™’s case is constructed of incredibly tough, clear polycarbonate.  The see-through case makes it easy to see the inner workings of databot™ and use it as a teaching tool.

The “front” orientation of databot™ has the large opening in the enclosure for several of the sensors, so make sure it is oriented towards the front when holding in your home position. 

Physical Design

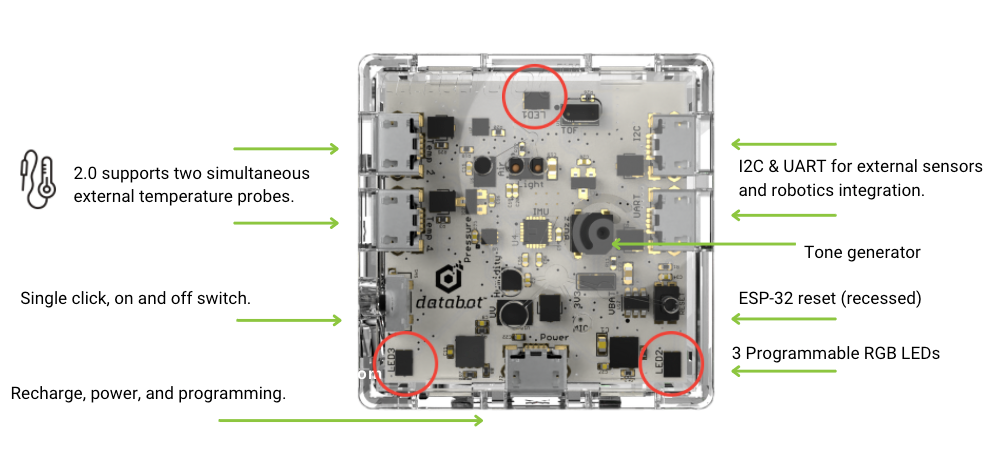
Still oriented in the home position, look carefully at this image of databot™’s topside and look for these features:

On / Off Switch (default Vizeey™ mode).  databot™’s switch is simple to use.  One click turns it on, a second quick click turns it off.  Try it!  Your databot™ ships with a program pre-installed to work with the databot™ app, Vizeey™.  When powered on in the home position, you will see an LED in the lower left hand corner pulsing a blue light waiting to connect to Vizeey™. 

On / Off Server Mode. databot™ uses its internal sensors to determine different modes of operation.  If you turn databot™ upside down and turn it on, you will activate Server mode and you will see a glowing green LED indicator instead of the blue beacon.  See the Modes of Use section of these support materials for instructions on how to use this mode and configure databot™ for offline use, access dashboards, and more.

Micro USB charging and programming port.  Located at the “back” of databot™ when you are in the home position,  Connect your charging cable here to upload programs and receive data for display through the Arduino IDE or other software you might be using. This is also the charging port, so this is where you plug in your databot™ to juice up the rechargeable battery. The 500mAh takes about an hour to charge and will run 4-6 hours depending on the type of use.

External temperature probe ports.  This is where you connect the waterproof temperature probe included in your kit. There are two ports, if you are using just one probe, use port number 1, closest to the power switch.

I2C & UART ports.  UART and I2C are popular communications protocols for electronic devices.  Using them you can connect a multitude of other sensors and devices!  More details on how to use these are located in our Deep Geek section of our online documentation.

Sound Opening. This enables the easy passage of sound from the tone generator so you can hear databot™ squeaking, chirping, chortling, or whistling.

databot™ Sensor Locations

Examining the databot™ circuit board and enclosure you will notice labels on the board and a number of openings in the enclosure. 

Large Enclosure Opening.  There is one large opening, two overlapping circles, that provides open line-of-sight access for the gesture and Time of Flight (2.5M proximity sensor) labeled TOF.  The sensor labeled “light” is actually a combined sensor package that includes ambient light, color, gesture, and a close proximity sensor.  The air quality sensor, labeled “Air” is also exposed by this large enclosure opening.

Three hole cluster openings. You will also notice three holes located in a cluster near the power jack at the back of the databot™. These provide air flow and clear line-of-sight for the UV sensor, the humidity sensor, and the microphone.

ESP32 Reset Opening.  You will notice a tiny opening in the enclosure on the right hand side.  This is for resetting the ESP32 processor, typically used by technical users.  This is not something most individuals will require as simply switching it off will reset databot™.

IMU. The Inertial Measurement module includes the accelerometer, gyroscope, and magnetometer and is located in the center of the board.

Air Pressure. The Barometric pressure sensor calculates altitude based on air pressure and is located to the left of the IMU.

*See the technical data sheets for the sensors for detailed information.

Educators: you can use the clearly labeled circuit board as a teaching tool for students studying robotics, programming, and electronics. 

databot™ Upside Down!

Looking at databot™ from underneath you can’t see much other than the battery, but directly behind the battery the processor, an integrated system using the Espressif ESP32 lives. This is where the BLE and Wi-Fi modules live in addition to the processor itself.  The ESP32 processor is widely used in IOT devices, robotics, DIY and wearables, and much more.  

More databot™ Options

This concludes your tour of databot™ basics.  databot™ ships pre-configured to work with our Vizeey™ software.  If you are interested in using databot™ with other software, such as Microsoft Excel, you can configure databot with Arduino-based tools.  Please visit the Arduino IDE getting started page to learn now.  You can also browse through the various help topics here to learn about the many ways you can use databot™!

Ready to Move On?

databot™ ships with software pre-installed and ready to work with Vizeey™ – an awesome science sensor app.  If you haven’t already setup your software and connected to databot™ now’s the time!

Let’s get set up and start conducting experiments!