databot Jack O Lantern eating an Arduino Uno board.

Ghost with the Most WiFi Coding Challenge!

Introduction & Coding Challenge

Recently we came up with the idea of a coding challenge to have various databots interacting with one another in real time.  For example, how could we have a group of databot “ghosts” for Halloween all reacting together when someone approaches them?   

Pseudocode for the Challenge:  

1) Use Proximity Sensor on a single, lead databot,  to detect an approaching object.  

2) Convey the proximity sensor information to the other databots in the ghost group and code them to react accordingly.

3) Trigger glowing eyes in different colors based on distance with different colored eyes on different ghosts

4) Emit different sounds from different databots based on the proximity data.

The first step of making this project come to life was to experiment with the live communications between databots where one could lead the others.  We decided to start simple with one databot controlling another, for this we created an awesome Halloween Pumpkin with two databots for glowing eyes.  Our goal was to have the eyes changing color in real time, with one databot telling the other what to do.  If we can accomplish this, the next step of a group of ghosts talking to one another should be relatively easy!  Fortunately, a recent new Pilot Release of MicroBlocks makes this a snap!

I eat anything hahahaha!
databot Jack O Lantern eating an Arduino Uno board.
I eat Arduino - it good! Bwahahaha.
databot Jack O Lantern eating Microbit board.
I eat MicroBit too - small and tasty. Bwahahaha!

How Does It work?

A new Pilot Release of Microblock has been released, you can access the Pilot releases on the MicroBlocks site here:

https://microblocks.fun/download

Snapshot from the MicroBlocks download page showing the pilot version selection.

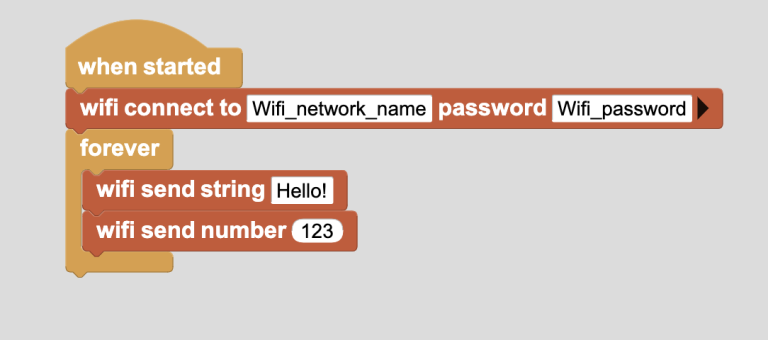
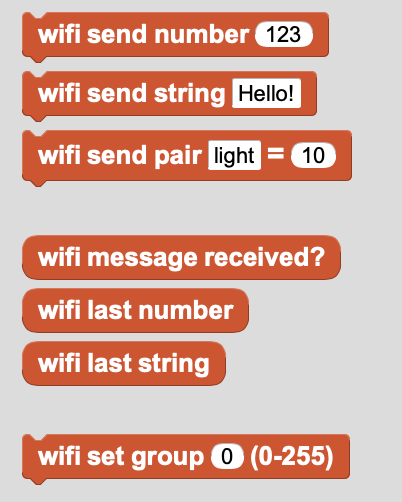
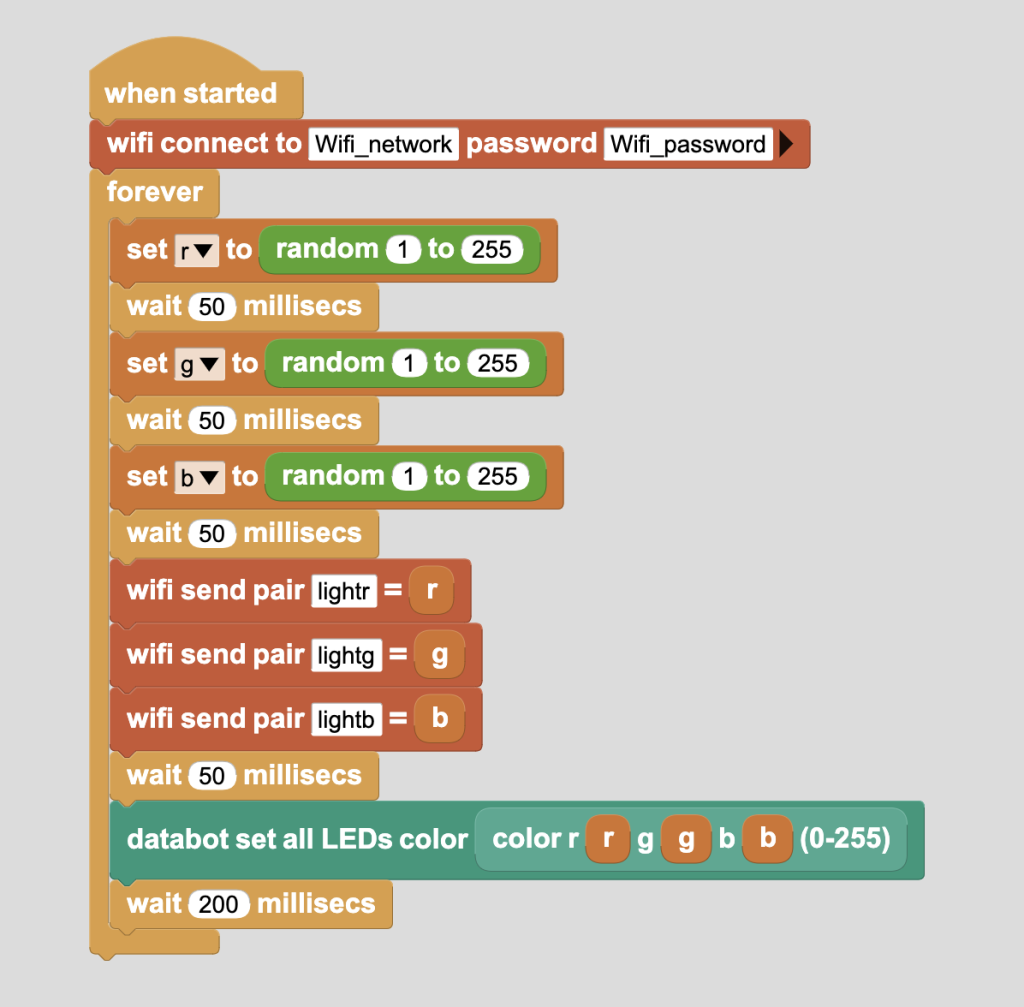
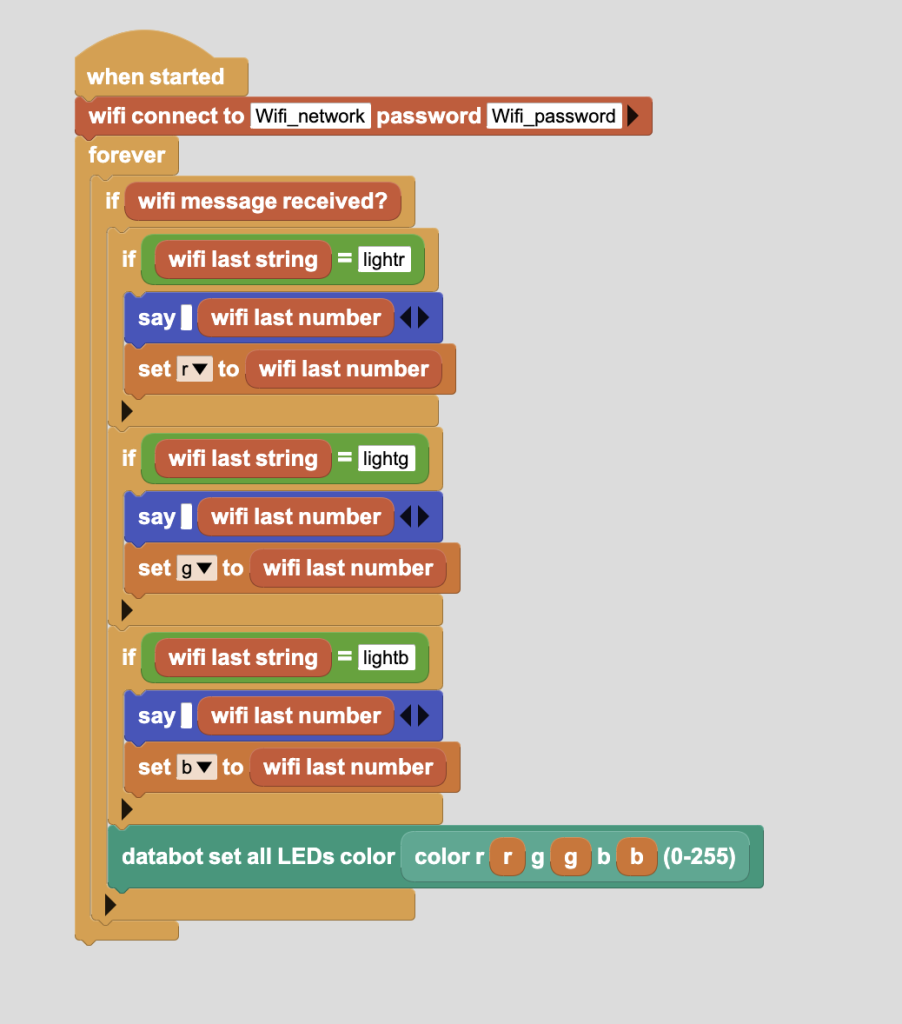
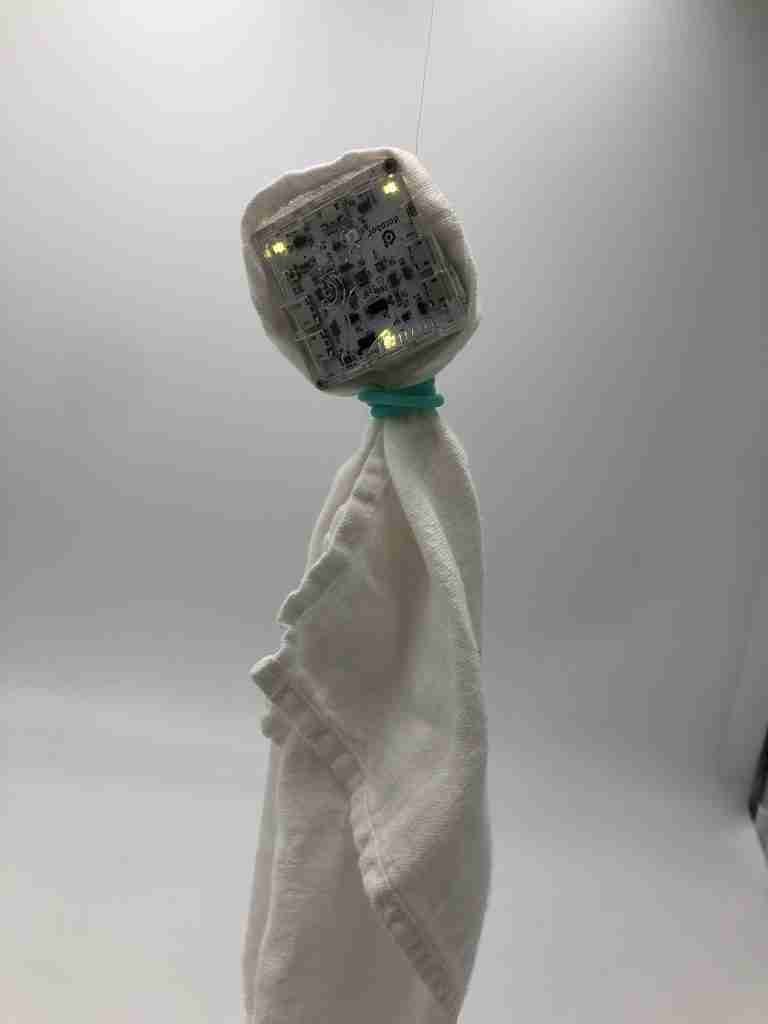
You can simply select Run Pilot in browser and it will load the same as the stable release.  This Pilot release includes a new WiFi Radio library for WiFi-enabled boards such as databot.  It allows easy data exchange between “databot” boards (and any other WiFi boards) that are on the same WiFi network.

Using MicroBlocks to prepare your code, databot gathers and organizes the information it wants to broadcast, connects to the WiFi network, and broadcasts it to any devices that are currently available. In this case, one databot acts as the primary controller and the other databots act as secondary, receivers. They can receive information and perform work based on the information received.

Getting Started

If you have not used the MicroBlocks coding environment with databot yet, follow the instructions on this Coding Starter Card.  It will show you how to connect, flash the MicroBlocks firmware to databot, and get started.  Once you are connected and ready to go proceed! 

1. Your first step will be to make sure you have the databot and WiFi Libraries loaded.  You will find the WiFi library under “Network” and you should see both the databot and WiFi libraries available after loading as shown below.

Snapshot of how to load the WiFi library in MicroBlocks
Screen capture of MicroBlocks UI with the WiFi and databot libraries loaded.

2 – Let’s look at two different programs built in MicroBlocks. The first code is for the secondary or receiver databot and will enable you to test the receiving function.
You can download the sample code here.

The first thing the databot board will do when this program is run is connect to your wi-fi network so it can listen for broadcasts.

  • Fill in the Wifi network name and Wifi_password with your local network name and credentials.
  • In this infinite loop the board will wait for data and as soon as the data is received it will display it immediately.

3 – This next code you will upload to the databot that will act as the primary, this will enable you to test the communication between the two.
Note that it only broadcasts information to the network and is not looking to receive any information itself.

You can download the sample code here.

In this example,  databot also connects to the WiFi network.

  • You need to specify the wi-fi network name and password
  • It is also necessary to specify the string and number we are going to broadcast for this test.

For performance testing, if you have only one computer, connect the receiver to MicroBlocks and run the program.  On your screen you will be able to see the output of the “Say” block to confirm it is working.  Your primary databot, when turned on, should connect to your network and broadcast your message to the secondary.  If your test is working congratulations, you’ve succeeded in wirelessly connecting two databots via wi-fi!  If it is not working, review your code, your network credentials and do some testing to debug your code.  Once it is working you can move on to the next stage!

Pumpkin Project

Let’s get back to our trial Pumpkin project.

We  know how to connect and transfer data between databots so now we need to set up our synchronous switching of LEDs on databots.

In the wifi radio library there are also other additional blocks that we can use.

  • We can send a number
  • We can send text
  • We can send a number along with the text.
  • Also, if necessary, we can select a group of databots to send data to (this will be very handy for our later ghost project).

1- So that you can repeat this project as quickly as possible – here is the prepared, ready-made code!
The code for the primary can be found here

Explanation to the code.

  • Connect to the network.
  • Create 3 variables that correspond to the color “r”, “g”, “b”.
  • For each of the light values generate a random number from 1 to 255 and write them to the variables.
  • Via wifi radio send the value of the numbers we generated.
  • We wait 50 milliseconds for the data to arrive.
  • Turn on the light on the databot from the data we generated.
  • Wait for 200 milliseconds and repeat the process so the eyes are blinking with new colors each cycle.

2- Here is the code needed for the secondary (receiver) databot.
You can download the sample code here

  • Explanation of the code.
  • Connect to the wifi network
  • Wait for data to be broadcast in an infinite loop.
  • As soon as a string with a color is received, write this color to a variable.
  • Repeat for all 3 color values.
  • After receiving –  output the light to the LED.

Wrap Up and Coding Challenge!

Now all you have to do is find Pumpkin and make your Halloween party unforgettable using a databot!  If you are ready to take on the Ghost with the Most Coding Challenge, proceed with your newfound WiFi skills coding with MicroBlocks to create a group of wailing ghosts led by a leader reacting to the proximity sensor as described earlier.  Share your code, video, and results and we will share the stories with the world!